Tuesday, May 12, 2020
Quaratine Project #3 - Large Paper Quilt
So here is my big accomplishment during my self quarantine. I've had this idea on my project list for over a year. It started with a Ohio Stars quilt that I saw on Pinterest that I really loved. I don't sew, but wondered if I could piece together something similar using scrapbook paper. I've used quilts as inspiration for paper collages before.
I drew out the pattern on a 24 x 24 inch stretched canvas, using the quilt on Pinterest as my guide.
Then I came up with a plan: I'd start my quilt with a map piece at the center. Then I'd use light color pieces for the center star. Once I got a combination of pieces together that I liked, I glued them down using acrylic medium.
Next, I started laying down pieces to create my brighter square (see finished photo above), using mainly reds, pinks, and greens.
Then I completed the outer large star with dark pieces of blue and purple paper.
I finished the corners using light paper again. This went pretty quickly as I was able to cut multiple pieces of paper at the same time to complete these areas.
As I often do with these quilts, I added some stamping using household items like pen caps and pencil ends to add additional color. I dipped these items in acrylic paint, then stamped them around my canvas where I wanted some more color or texture.
This has been the silver lining of our stay at home orders - I've had this project in the works for a long while and this quiet time has given me the opportunity to see it through. I'm working on framing this large quilt collage, as I did with this collage. I'm really happy with how this project turned out.
Saturday, May 9, 2020
Quarantine Project #2 - Children's Scrap Yarn Rainbow
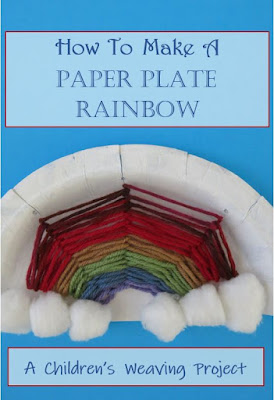
And here's another project that I've been working on during our stay at home orders - a children's weaving project to make a rainbow using scrap yarn.
This craft begins uses half of a paper or foam plate with a raised rim. The plate needs to be strung with some cord or string before beginning the weaving process. Adults should do the initial preparation for setting up the plate loom, but kids will enjoy watching their rainbow appear before their eyes.
This is a "make and make do" project, using materials that are basic and handy. You can use any weight of scrap yarn for this project. For each color of the rainbow, you only need about 3 feet of yarn. If you don't have one color, you can just substitute two shades of another. I have all the directions with photos on Hubpages for you to follow.
Wednesday, May 6, 2020
Quarantine Project #1 - Hearts and Flower Mother's Day Card
Although I haven't been posting, I've managed to complete a few projects during my self-quarantine that I'm excited to share. The first is a scrapbook paper Mother's Day card that I made for my Mom. I didn't plan on posting this project, so I didn't take any process photos. But yesterday I went to the store and noticed there was very little stock in the card aisle. So I thought others might be looking for a homemade card idea.
It started with a sketch and a simple idea to make a flower using hearts as the petals. Then when I drew in the background, I thought to add another heart detail to the back.
I traced a number of hearts on to some coordinating scrapbook paper. I had a small heart sticker that I used as my template for tracing.
I used a pre-made store bought blank cards with an envelope to begin. I glued down a piece of sky blue paper for my background and added my green landscape. To create the flower, I layered seven hearts in a circle, alternating the pattern of the paper. I was going to use a button for the center, but used a gem stone instead.
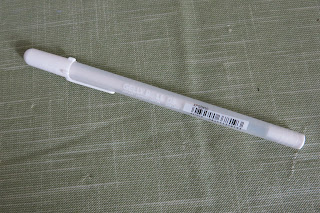
I wanted my image to have a cute patchwork look to it, so I pulled out a jelly roll opaque white pen I had in my supplies. I tested this pen on some scrap to see if it would show up on my paper. It worked perfectly.
I used the pen to draw a dotted line around most of the large images on my card. I'm pleasantly pleased with the finished look.
For the inside of the card, I searched for a Mother's Day greeting online and printed this out on another piece of paper. I then trimmed this paper to size and glued it into my card using glue stick.
Hope you have a wonderful Mother's Day and find some time for crafting too!
Subscribe to:
Posts (Atom)


